Mastering How To Use SSH Remote IoT: A Comprehensive Guide For The Modern Techie
Alright, listen up, tech enthusiasts! If you’re reading this, chances are you’re knee-deep in the world of IoT (Internet of Things) and wondering how to leverage SSH for remote access. Let’s face it, SSH (Secure Shell) isn’t just some random tech buzzword—it’s a game-changer when it comes to managing remote devices securely. Whether you’re a hobbyist tinkering with Raspberry Pi or a professional handling enterprise-level IoT deployments, understanding how to use SSH for remote IoT is an absolute must-have skill. So, buckle up because we’re about to dive deep into the nitty-gritty of SSH remote IoT.
Now, why should you care? Well, imagine being able to troubleshoot a sensor node located miles away without having to physically touch it. Or, how about configuring a smart home device from the comfort of your couch? SSH makes all of this possible by providing a secure communication channel between your local machine and remote IoT devices. It’s like giving your devices a virtual handshake, only much cooler and way more secure.
But hold on, because there’s more to SSH than meets the eye. In this guide, we’ll break down everything you need to know about how to use SSH for remote IoT, from setting up the basics to advanced configurations that’ll make even the most seasoned techies nod in approval. So, whether you’re a beginner or looking to level up your skills, this article’s got you covered. Let’s get started, shall we?
Table of Contents
- What is SSH and Why Does It Matter for IoT?
- Setting Up SSH for Remote IoT Devices
- Securing Your SSH Connections
- Advanced SSH Configurations for IoT
- Common Issues and Troubleshooting
- Real-World Use Cases of SSH in IoT
- Best Practices for Using SSH in IoT
- Essential Tools and Software for SSH Remote IoT
- The Future of SSH in IoT
- Wrapping It Up: Your Next Steps
What is SSH and Why Does It Matter for IoT?
Alright, let’s start with the basics. SSH, or Secure Shell, is like a digital Swiss Army knife for remote device management. It allows you to connect to a remote machine securely, execute commands, and transfer files—all while keeping your data safe from prying eyes. Now, when it comes to IoT, SSH becomes even more crucial because many IoT devices are deployed in remote locations where physical access isn’t always feasible.
But here’s the kicker: IoT devices are often resource-constrained, meaning they don’t have the luxury of running heavy-duty security protocols. That’s where SSH shines. It’s lightweight, secure, and easy to implement, making it a perfect fit for IoT applications. Whether you’re managing a fleet of smart sensors or a network of industrial controllers, SSH gives you the control you need without compromising on security.
How Does SSH Work in IoT?
Think of SSH as a secure tunnel that connects your local machine to a remote IoT device. Here’s how it works:
- Authentication: You authenticate yourself using a username and password or, better yet, SSH keys.
- Encryption: All communication between your machine and the remote device is encrypted, ensuring that no one can eavesdrop on your data.
- Command Execution: Once connected, you can execute commands, transfer files, and even set up port forwarding—all from the comfort of your terminal.
Simple, right? But don’t let its simplicity fool you—SSH packs a powerful punch when it comes to securing your IoT infrastructure.
Setting Up SSH for Remote IoT Devices
Okay, so you’ve decided to take the plunge and set up SSH for your IoT devices. Great move! But where do you start? Fear not, because we’ve got a step-by-step guide to help you get up and running in no time.
Step 1: Enable SSH on Your IoT Device
Most IoT devices come with SSH pre-installed, but you’ll need to enable it first. Here’s how:
- Log in to your IoT device via a local terminal or console.
- Run the command
sudo systemctl enable sshto enable SSH on boot. - Then, start the SSH service using
sudo systemctl start ssh.
And just like that, your device is ready to accept SSH connections!
Step 2: Connect to Your Device
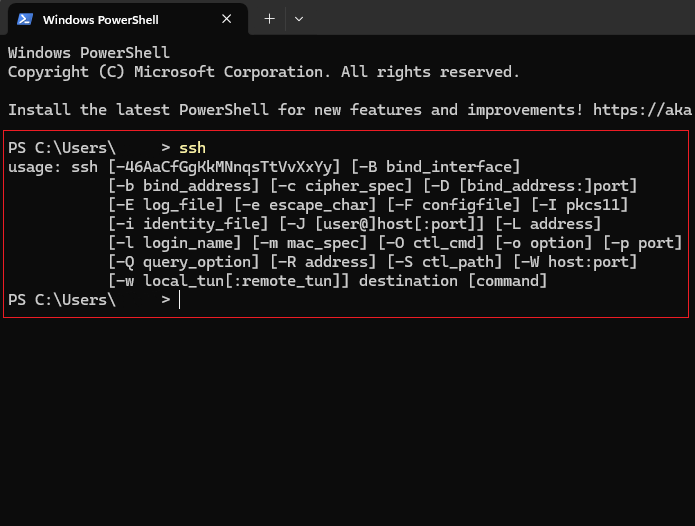
Now that SSH is enabled, it’s time to connect to your device. Here’s what you need to do:
- Open your terminal and type
ssh username@device_ip, replacingusernameanddevice_ipwith your actual credentials. - When prompted, enter your password or use an SSH key for authentication.
- Voila! You’re now connected to your IoT device remotely.
See? I told you it was easy.
Securing Your SSH Connections
Now, here’s the thing: SSH is secure by design, but that doesn’t mean you can let your guard down. Cyber threats are real, and IoT devices are often prime targets for hackers. So, how do you make sure your SSH connections are as secure as possible?
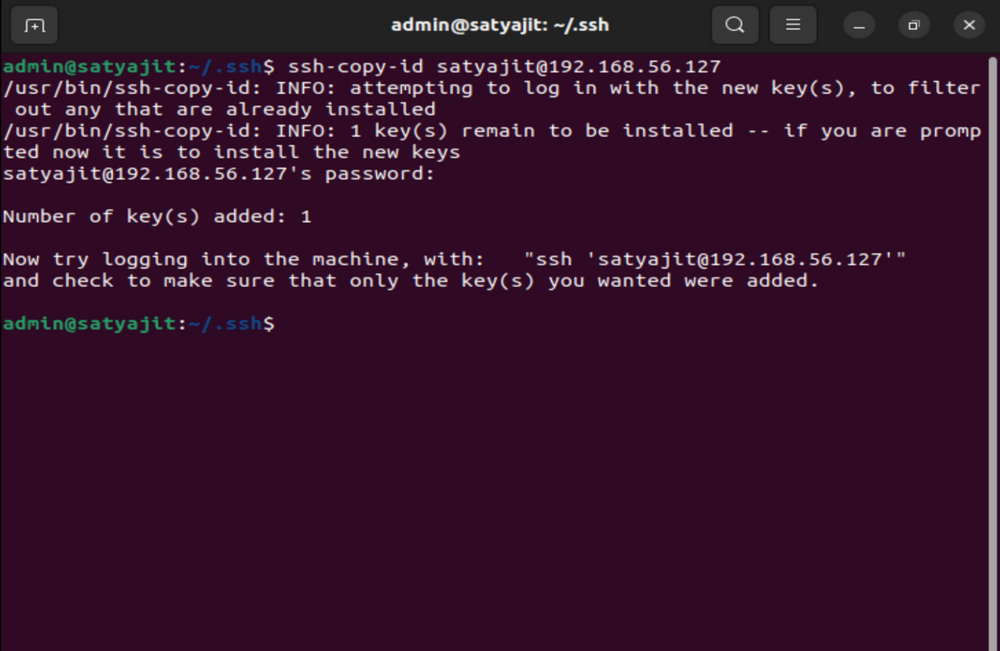
Use SSH Keys Instead of Passwords
Passwords are so 2000s. In today’s world, SSH keys are the way to go. Here’s why:
- They’re more secure because they’re harder to brute-force.
- They save you time by eliminating the need to enter passwords every time you connect.
- They’re easy to set up—just generate a key pair using
ssh-keygenand copy the public key to your device.
Trust me, once you switch to SSH keys, you’ll wonder how you ever lived without them.
Disable Root Login
Root access is like handing over the keys to your kingdom. Unless absolutely necessary, disable root login to prevent unauthorized access. Here’s how:
- Edit the SSH configuration file using
sudo nano /etc/ssh/sshd_config. - Find the line
PermitRootLogin yesand change it toPermitRootLogin no. - Restart the SSH service with
sudo systemctl restart ssh.
Boom! Your device is now safer than ever.
Advanced SSH Configurations for IoT
Once you’ve mastered the basics, it’s time to level up your SSH game with some advanced configurations. These tips will take your IoT management skills to the next level.
Port Forwarding
Port forwarding allows you to access services running on your IoT device from your local machine. Here’s an example:
- Suppose your device is running a web server on port 80.
- To access it locally, use the command
ssh -L 8080:localhost:80 username@device_ip. - Now, open your browser and navigate to
http://localhost:8080to view the web server.
Neat, huh?
SSH Tunnels
SSH tunnels are like invisible highways that let you securely access services behind firewalls. Whether you’re accessing a database or streaming data from a sensor, SSH tunnels have got you covered.
Common Issues and Troubleshooting
Even the best-laid plans can go awry. If you’re having trouble with SSH, don’t panic. Here are some common issues and how to fix them.
Connection Refused
If you’re getting a "connection refused" error, chances are the SSH service isn’t running. Double-check that SSH is enabled and started on your device. Also, ensure that your firewall isn’t blocking the SSH port (usually 22).
Authentication Failed
Authentication errors are usually caused by incorrect credentials or misconfigured SSH keys. Verify that your username, password, and keys are correct. If you’re using keys, make sure the public key is added to the ~/.ssh/authorized_keys file on your device.
Real-World Use Cases of SSH in IoT
Enough with the theory—let’s talk about how SSH is being used in the real world. Here are a few examples:
Smart Agriculture
Farmers are using SSH to remotely monitor and control irrigation systems, ensuring optimal water usage and crop yield.
Industrial Automation
In factories, SSH is used to manage and monitor robotic systems, reducing downtime and improving efficiency.
Smart Cities
Cities around the world are leveraging SSH to manage traffic lights, public Wi-Fi networks, and other smart infrastructure.
Best Practices for Using SSH in IoT
Here are some best practices to keep in mind when using SSH for IoT:
- Always use strong passwords or SSH keys for authentication.
- Disable unnecessary services on your IoT devices to reduce attack surfaces.
- Regularly update your devices to patch security vulnerabilities.
Following these practices will help you build a secure and reliable IoT infrastructure.
Essential Tools and Software for SSH Remote IoT
When it comes to SSH, having the right tools can make all the difference. Here are a few essentials:
Terminal Emulators
Whether you’re using PuTTY on Windows or Terminal on macOS, a good terminal emulator is a must-have for SSH connections.
SSH Clients
For more advanced features, consider using tools like MobaXterm or Termius, which offer enhanced functionality and ease of use.
The Future of SSH in IoT
As IoT continues to grow, so does the importance of secure communication protocols like SSH. With advancements in quantum computing and AI, we can expect SSH to evolve and adapt to new challenges. One thing’s for sure—SSH isn’t going anywhere anytime soon.
Wrapping It Up: Your Next Steps
Well, there you have it—a comprehensive guide to mastering how to use SSH for remote IoT. From setting up SSH to securing your connections and exploring advanced configurations, we’ve covered it all. Now, it’s your turn to take action.
So, what are you waiting for? Fire up your terminal, connect to your IoT device, and start exploring the possibilities. And don’t forget to share this article with your fellow tech enthusiasts. Who knows? You might just inspire someone to take their first steps into the world of IoT.
Until next time, keep hacking, keep learning, and keep building a smarter world—one SSH connection at a time!
How To Navigate The "Buscar Kid Mom Video" Trend: A Comprehensive Guide
Exploring The World Of Jerkofftocelebs: A Deep Dive Into Fan Culture And Celeb Worship
Jeff Fahey Wife And Kids: Unveiling The Personal Life Of A Hollywood Icon
How to Use SSH in Windows to Connect to a Remote Server
How To Use Ssh On Ubuntu Server

How to use SSH key to Connect Remote Server?
